The Define your own report link is provided in all Browse report pages. Reports defined through this option are added to your Browse Format list, represented by a name you choose in defining the report. Your custom report definitions are available for all of the search tasks defined for the same database, and they are retained for the duration of your session (even after you move between modules and databases). You can print or save locally a custom-defined report.
Each element of the Define your own report page is described below.
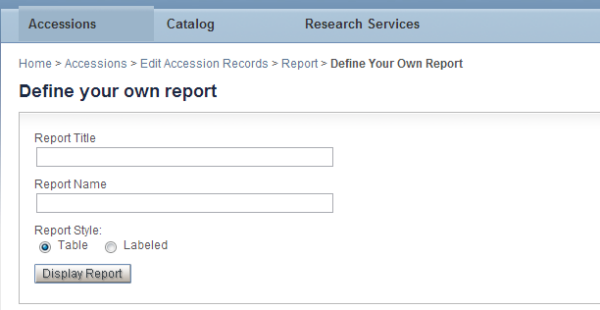
Report Title. Optionally, enter a descriptive name for the search/set of records to be included in the report.
Report Name. Assign a name that will help you distinguish each of your custom reports in the Select Format listbox.

If you do not assign a name, Temporary Custom Report will automatically be used in the listbox.
Report Style. Choose between these two styles:
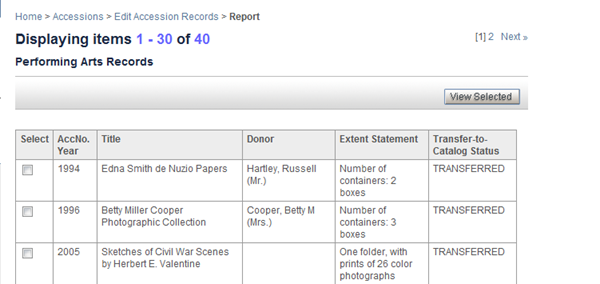
Table. Each record is represented as a row, in a spreadsheet-type presentation, with field names as column headings.
|
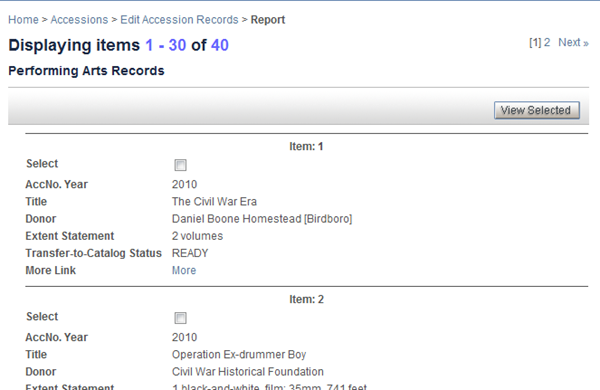
Labeled. Each field is represented in its own row.
|
Display Report. After you have selected the fields and the sort order that you want, use this button to display the report. To fine-tune your definition, use the Define your own report link again to return to the Custom Report definition page.
Fields Available. The fields in the left-side box are listed in alphabetical order, beginning with the optional non-field report elements that allow for viewing the full record and making selections.
- To make selections one at a time, click on the field name in the left box and then click the Add button to have them listed in the Fields Selected box.
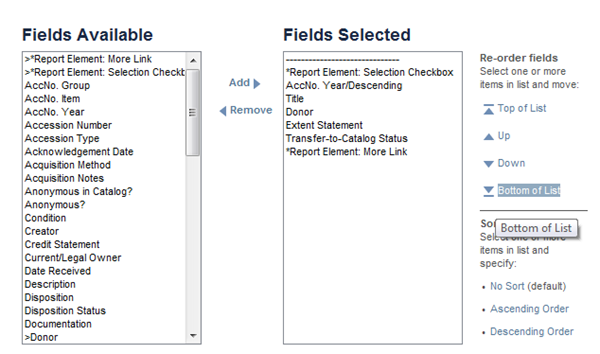
- To make multiple selections, use either of the two standard Windows methods — ctrl-click on each field name in the left box or shift-click, to select a contiguous set of fields. Then click Add.
After you have added a field to the Fields Selected box, the signal that it has already been selected from the master list is the leading > that displays before the field name. (This visual clue is not retained if you return to this page to modify the report.)
Fields Selected. Work in this box, along with the option links on the right, after you have added the set of fields/report elements of interest. In this box, you can:
| 1) | delete fields from the list by using the same selection methods as just described but using the Remove button. |
| 2) | reorder the list by selecting one (or several) and clicking the up, down, top of list or bottom of list buttons. |
| 3) | specify how you want the report to be sorted by selecting a field and then clicking either Ascending (A-Z) or Descending (Z-A) Order. You can specify more than one field, for a multi-level sort, e.g., in a report by authors with a sort by authors and titles, all records with the same authors will be sorted by title. Records that do not have data in the primary sort field will sort to the top. The character-order of a sort is: special characters, followed by numbers, followed by A through Z, and ending with the ~. |