The STAR Filing System (SFS) is a suite of programs for use in STAR Web applications that allows for attaching one or more images/other electronic files to database records and to access those files in reports and edit forms.
|
SFS Import, which can be launched from either an Accessions or Catalog form, provides an interface for your browsing to a local or network directory/folder to choose a file to be attached to your current record. SFS transfers ("uploads") your selected files into an SFS repository on your STAR host system and communicates with JavaScript in the input form to provide data about the file(s). You can browse multiple times to choose several files that you want to associate with a single record and those files can include zip and tar files containing sets of files. Please note that the zip and tar files must be flat, i.e., do not use subfolders. SFS automatically extracts the individual files and treats each individually. SFS Service is a background process that, with the standard STARfetch program, retrieves files from the SFS Repository. |
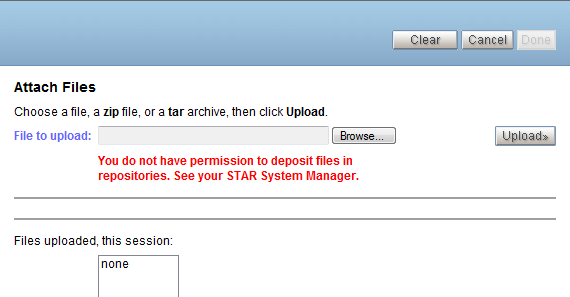
Use of the SFS Import interface requires that a staff login record (see Management → Application Management Users task) include a setting for the Repository to be used by the application. This feature also allows for controlling the repository (or repositories) that a particular staff member can file to. If the setting is missing or invalid, you will see the message shown below.
Instructions follow below for attaching files to Catalog and Accessions records.
Catalog Forms
|
Tip. If you have many images in an envelope/folder or box, consider the issue of performance in attaching many occurrences to a single record and, instead, establish separate records for smaller batches of images. |
| Step 1. |
In an occurrence of the SFS File (LINK) field, click the first paperclip button to launch SFS Import and start the process of attaching regular-resolution files to your record. If attaching multiple files, you can return after each filing to attach the thumbnail file or do them in a second pass. As already documented, thumbnail images will be generated automatically for reports if you do not have a small-size image equivalent.
|
| Step 2. |
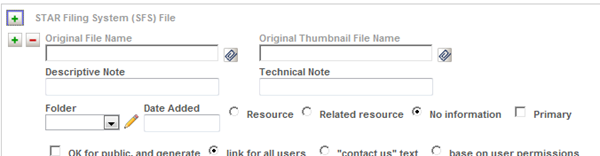
On the main SFS Import interface page, click the Browse button to navigate to a file that you want to associate with the current record — a file on your local disk or a network disk.
After you select the file — by double-clicking or clicking Open — SFS Import returns you to the interface page so that you can click the Upload button.
If more than one Repository has been configured on your system, this interface page will also include a radio button list so that you can make a selection (see example below). |
| Step 3. |
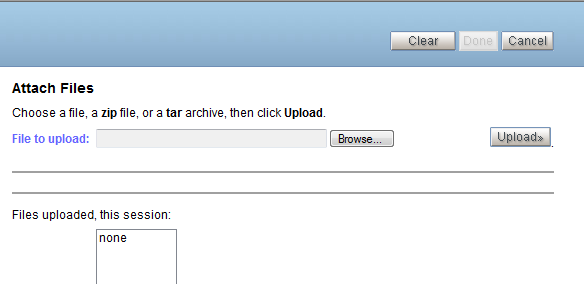
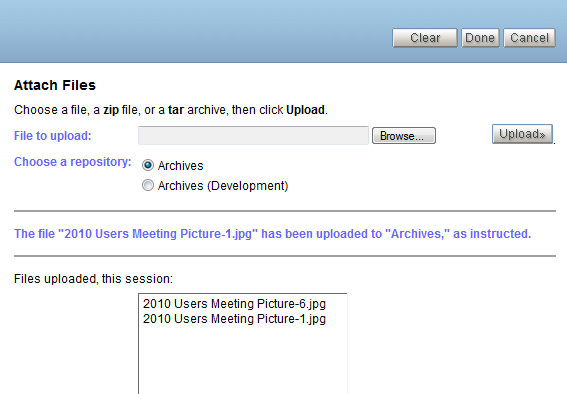
Click Upload and wait for the file transfer to take place. You will be returned to the interface page with the feedback shown below, using the assigned "friendly" name for the SKCA Repository.
|
| Step 4. |
To link additional files, repeat Steps 2 and 3. The names of uploaded files will be accumulated in the Files uploaded this session: box. The screen capture also illustrates the options if more than one Repository has been configured, using a second in-house test Repository name.
|
| Step 5. |
When you are ready to have the files attached to the catalog SFS field, click Done. |

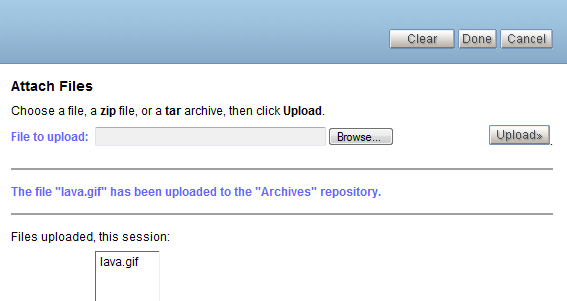
The Done operation closes SFS Import and constructs one occurrence for each uploaded file (associated with the main, not thumbnail filings). Selected subfields of each occurrence will be populated automatically, as illustrated below. All but the Date Added subfields of the automatically filled-in subfields are protected and cannot be modified. Fill in the remaining subfields and, optionally, change the date value if "today's" date is not applicable.
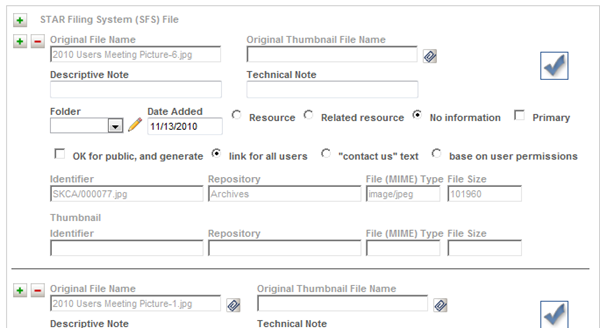
- The checkmark image indicates that the file has been transferred into the repository. It is not a clickable link since the assumption is made that you can view the original file that you just added to the repository.
- At a minimum, fill in the Descriptive Note for a caption and check whether the file is OK for public access.
After you have updated the record and later recall it, the checkmarks are replaced with the actual images for file-type icons as clickable links.
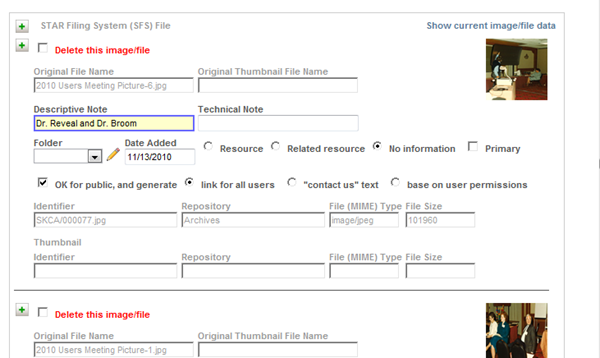
- To remove the link to the file, check the Delete this image/file checkbox.
- To add more files, click the plus to insert a new occurrence and follow the steps provided in the previous section.
Accessions Forms
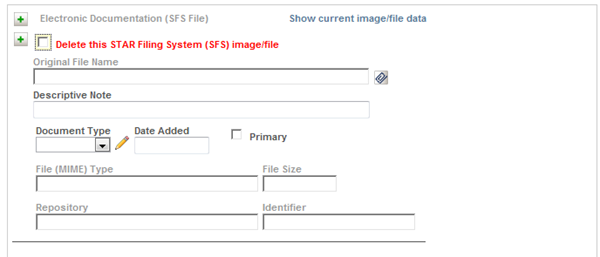
The Electronic Documentation (LINK) field is defined to provide an SFS Import interface so that you can associate an Accessions record with one or more electronic documents (e.g., correspondence and agreements).
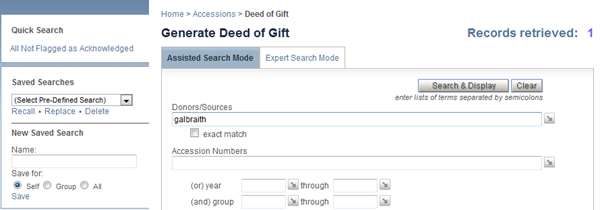
In the Steps that follow, the assumption is made for purposes of illustration that you have generated the Deed of Gift and saved it locally as a PDF.
| Step 1. |
Search for the accession record(s) that you want to recall for attaching the now-generated PDFs, e.g., in the Edit task or the Deed of Gift task.
|
| Step 2. |
Click Search & Display and, in the Browse report, click Edit (or, if you have retrieved several records, check the ones you want (or click the Select all link to check them all), and click Edit Selected). |
| Step 3. |
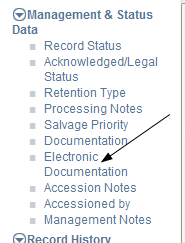
In the edit form, scroll or jump to the Electronic Documentation field in the Management & Status Data field group.
Although we are attaching a new image file, the edit form also allows you to mark that an already attached file is to be deleted — the checkbox shown below with a red caption.
|
| Step 4. |
In an empty occurrence of the field, click the paperclip button to launch SFS Import. |
| Step 5. |
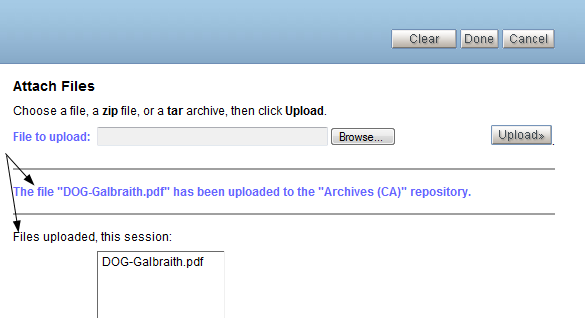
On the main SFS Import interface page, click the Browse button to navigate to a file that you want to associate with the current record — a file on your local disk or a network disk.
After you select the file — by double-clicking or clicking Open — SFS Import returns you to the interface page so that you can click the Upload button.
If more than one Repository has been configured on your system, this interface page will also include a radio button list so that you can make a selection. |
| Step 6. |
Click Upload and wait for the file transfer to take place. You will be returned to the interface page with the feedback shown below (illustrated with the Repository name used in the CA version of SKCA).
|
| Step 7. |
To link additional files, repeat Steps 5 and 6. The names of uploaded files will be accumulated in the Files uploaded this session: box. |
| Step 8. |
When you are ready to have the files attached to the catalog SFS field, click Done. |
The Done operation closes SFS Import and constructs one occurrence for each uploaded file. Selected subfields of each occurrence will be populated automatically, as illustrated below. All but the Date Added subfields of the automatically filled-in subfields are protected and cannot be modified. Fill in the remaining subfields and, optionally, change the date value if "today's" date is not applicable.
You can modify the listbox authority to represent your Document Type values.
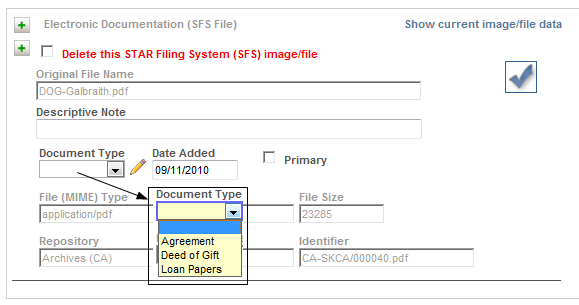
When you add new files/images, a checkmark is used as a placeholder for the file-type icon or image.
After the have updated the record and later recall it, the checkmark is replaced with the actual image (for .jpg and .png files supported by the browser) or a file-type icon, for direct access while you are editing. The image/file type icon is also generated in the Preview by Title report, as illustrated below.
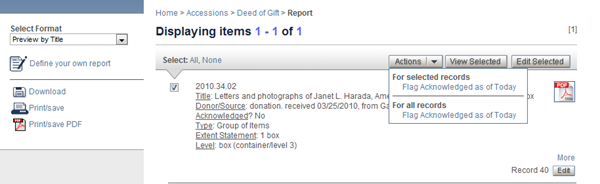
To complete the task of generating the Deed of Gift and attaching the PDF, you can use the global Action button to flag all or a selected set of retrieved record(s) as being acknowledged with a date of "today."