See:
| "Browse/"Search Results" Reports Formats View Selected Button "See more..." Report Links in Browse and More Reports Print/Save Download |
Browse/"Search Results" Reports
After you formulate a Quick or Advanced Search and click Search — or click one of the pre-defined search links — you are automatically taken to a report page with the default report (or the one that you last chose). Browse reports are designed to let you review your "search results."
The Browse page contains these elements:
- The Select Format listbox contains a set of reports (see) that provide for reviewing the retrieved records in several different presentation formats.
-
The "breadcrumb" line under the module tabs tells you where you are and where you came from, e.g., you are on the Search Results page, having entered a Quick Search on the start page (Home). Use these breadcrumbs links to navigate back to a previously used page.
The Browse page reports are always represented by the Search Results link.
- The Displaying Items line reports the number of retrieved records currently displayed with the total count. To the right of that line are navigation links — [2] [3]... Next — for moving to the next/subsequent and previous pages.
-
The Select line provides one or two All... links, for having the select checkbox enabled for all retrieved records on the current page or across all pages.
Alternatively, you can make individual selections by checking the Select checkbox for those items. Individual selections will accumulate across subsequently requested pages. The None link is used to remove all selection checks, across all pages.
After making selections, use View Selected to have a new report generated with just the selected records. If you want to refine your selections further, remove the checkbox for any one or several items, and use Refresh to have the report re-generated without the de-selected items. To return to the full results report page, use the Search Results breadcrumb link.
- For all retrieved records or your selected subset, you can choose from among the link options listed on the leftto print/save or download a report — or, you can define your own Custom Report.
- To generate a "more data" report for a given record, click the Full Record link.
The set of pre-defined reports is shown below.

-
The two Brief... reports include the same catalog fields but present the items sorted in different ways.
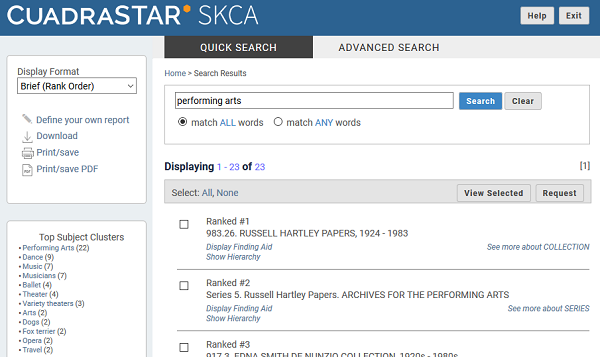
Brief (Rank Order). This is the default report for the Quick Search. It displays a constructed "title statement" that includes the hierarchical path for all sublevel records.
The records are displayed on the basis of a cluster analysis performed by the system on your search terms against a set of pre-assigned weights for different fields. For example, if most of your search terms are represented in the Subject or Title fields, the item may end up with a higher rank than if the majority of terms are in the Content Notes or Biography/Profile fields.
The Rank Order report includes a second report, the Top Subject Clusters report, which presents up to 20 subject terms assigned to items within your retrieved set, in descending order by the frequency with which they are represented. A term must be assigned to at least two records to be included in the list. This cluster report is intended to help you to assess the topical composition of your retrieved set and to identify potentially useful other search terms.
If you click one of the terms, a new search will be executed of that term, to restrict the report to those items within your retrieved set with a given subject assignment. Use the breadcrumbs to return to the starting Browse report — Search Results.
Brief. This report displays the same data except in a different sort order: by collection and within collection, by title and hierarchial.
-
Preview. This report presents more information about your retrieved record set and orders the report in collection/hierarchy order. For example, in the display below, the second "Correspondence" record is a level-2 Series record within the Pinska collection.
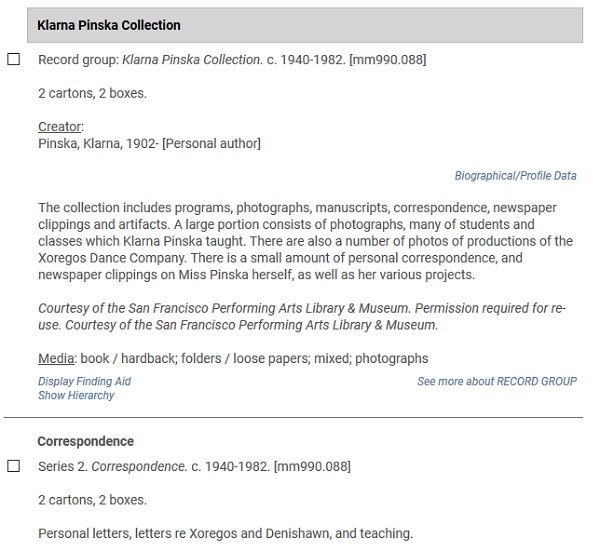
To narrow your retrieved set to a subset of interest, click the checkboxes for those items and use View Selected to have the report regenerated with just with those items. If you disable a checkbox, click Refresh to have it regenerated without the removed items.
The collection/hierarchy context for your subset will be included in each of the reports.
Previously selected records will accumulate in subsequently generated reports unless you clear out those selections, e.g., using the Select None link.
The link name for displaying the full record from a Browse "Search Results" report varies to reflect the level name assigned by the Archive to each record. This is illustrated below with the See more about COLLECTION and See more about SERIES links.
On this More report page, navigate between retrieved records, using the Previous and Next links. The order of records in the More report mirrors the sort order of your currently selected Browse report.
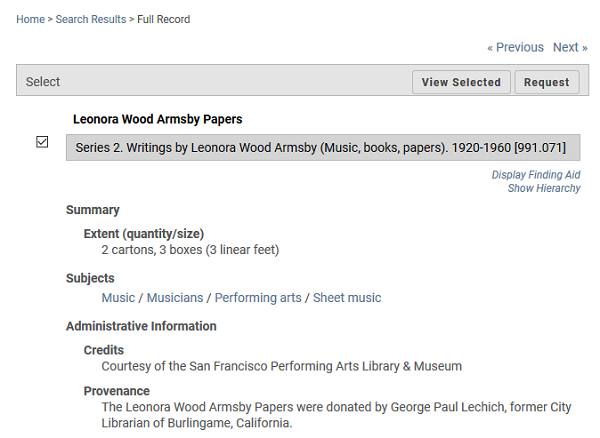
- When you have oped to "see more," where you are in the breadcrumb line will always be shown as Full Record.
-
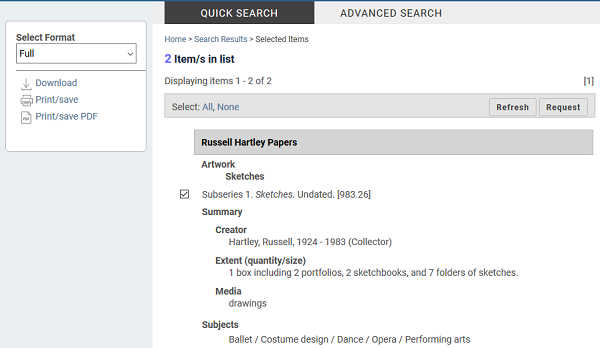
If you are reviewing several items in more detail to decide which ones to include in a next action (e.g., Print/Save), selections you make will accumulate as you use the Next and Previous options At any point in this navigation, you can then display all of those selections with View Selected and, in the selected-items report, choose the applicable report-generation option.
If you also made selections in the Search Results report, the selected set will accumulate until your clear out the selections.
Links in Browse and More Reports
Several types of links are used within the reports described above.
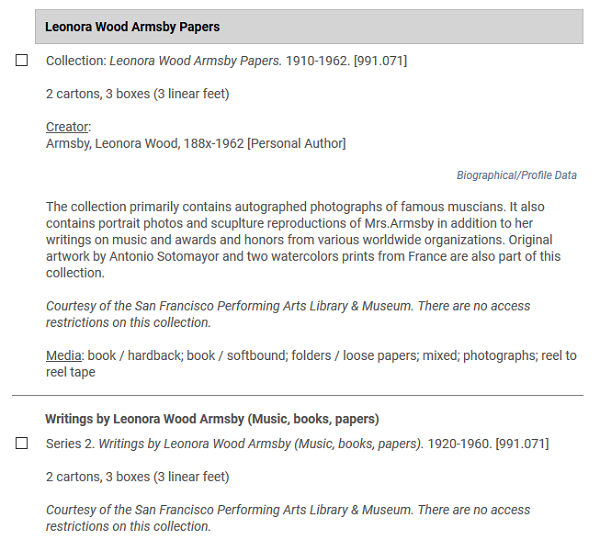
- In a Browse report, records may have a Biographical/Profile link that generates a secondary report in a popup window.
-
In all of the display reports, you have the option to generate the full Finding Aid report or the Show Hierarchy report, illustrated below. Click the + to open up levels of the hierarchy of interest and to help you place the current retrieved record in context of the collection's overall arrangement. Use the toolbar options to print or save this report.
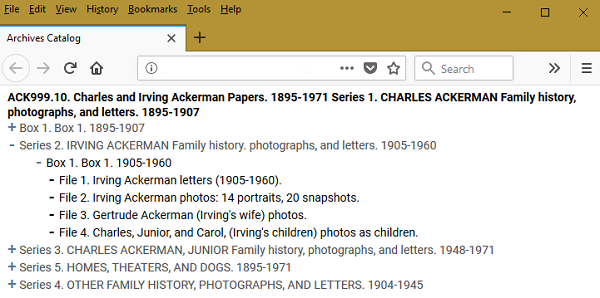
This report link will not be included if you retrieve records from a non-hierarchical eollection.
- In the See more... report, search links will be generated in both the Creator and Subject parts of the report if any name or term is present in more than the current record that you are displaying. Clicking a name or term will execute a search that takes you to the related-records report page, with the same options described earlier, so that you can take a side-trip to explore other possible records/collections of interest.
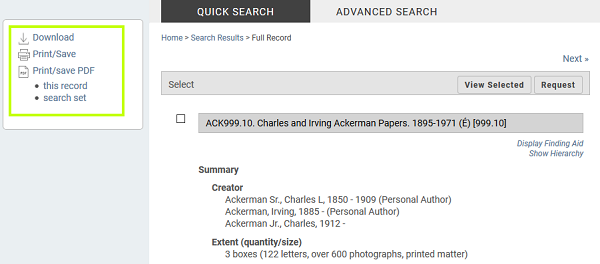
The Print/Save links available on the Browse and More report pages, as well as the Selected items report page, are used to generate a printer-friendly text version of the current report — one without the current HTML page elements — or as a PDF report.
When you click one of the Print/save links, a preview report is generated in a popup window.
- To submit the current report to your local or network printer, use the toolbar or File menu Print option.
- To save the current report in a local file, use the Save As File menu option.
In the More report page, the Print/Save links provide a menu option. Click to open the menu and make a selection to Print/Save only the current record or all records in your retrieved set.
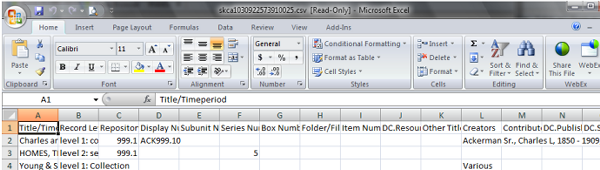
As noted above, the Print/Save option lets you download the current report to your desktop as a text file or PDF. The Download link also provides for transferring text data to your desktop, with two differences: the report is a full-record report (not the current report) and the data are generated in a comma-separated-values (.csv) file format.
When you click the link, a separate popup window is generated with an explanation and a Download CSV File Now link used to have that file transferred to your desktop. The helper application for a .csv file is typically Excel, which will typically be launched automatically so that you can then save the file locally.
The file in Excel will look like the column and rows file shown below, prior to your applying a Format option for resizing the width of the columns.